It took me a while to finish this guy, but at last its done :D
Saturday, January 21, 2012
Workbench - Lelouch from Code Geass
A fun, not too complicated project.
This is Lelouch from Code Geass in his school uniform.
Parts after the wash.
Dry fit. The fit was so good that I didn't really needed to use any putty. Shocking :D
The eyes are the mirror to the soul. His turned out very nicely :D
All of the lines were hand painted. Yeah for a steady hands \(^o^)/
This is Lelouch from Code Geass in his school uniform.
Parts after the wash.
Dry fit. The fit was so good that I didn't really needed to use any putty. Shocking :D
The eyes are the mirror to the soul. His turned out very nicely :D
All of the lines were hand painted. Yeah for a steady hands \(^o^)/
Tuesday, January 17, 2012
Workbench - "Little" Mermaid
OK, for a big change, this project is all MINE :D
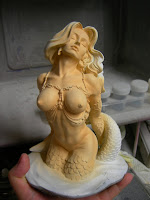
I found this statue on eBay and just couldn't resist buying her. Such a beautiful sculpt that got covered up with bronze paint.
She actually had lots of problem areas. Some of them were very hard to reach :D
After all the cleaning, she is ready for some paint
First layer is base skin tone.
Followed by darker skin tone shading.
And finished up with some pastel shading.
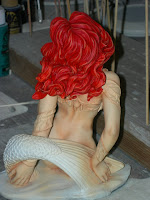
Next step is the hair. Fist layer is neon orange, followed up by washes of dark red and dry brushed with some light yellow.
I had to take some pictures with flash to show the shading on the hair better. So one picture is with flash and the other is without. Ignore the skin tone on the pictures with flash, it makes it look splotchy :D
Painted some details, like shells, pearls and her net.
Every fish needs a tail :D
Painted her tail light yellow first, followed up by some light green, dry brushed red for the fins and airbrushed it with the same red to bring it all together.
As I was working on her fin, I started to work on her tail too.
First painted it green...
Next I washed it with darker green
Followed up by dry brushing some yellow to highlight the scales
To bring the whole tail together, I dry brushed some more of the red on the end of the tail and after that airbrushed the fin with base green color that I used on the tail (sorry I don't have the picture of the last step, but you can see it on the finished model :D)
The last stretch of the project.
The base.
I used oil paint to paint water. I needed something that would blend very nicely.
Added some clear waves by applying Gloss Gel. It dries clear.
I entered this kit in a contest, so this is the reason why I couldn't show my progress as I went. Sorry for so many pictures :D
Subscribe to:
Comments (Atom)


