Showing posts with label Card Captor Sakura. Show all posts
Monday, October 27, 2014
Wednesday, February 12, 2014
Card Captor Sakura - The Sheep
I made this kit as a back up for one of the forums contests. I was working on Nu Wa at the same time, but wasn't sure if I was going to finish it.
When I started painting this kit, I just got bunch of new Golden Acrylic High Flow colors and of course I had to try them out :D I really love all the transparent colors available.
This is pretty easy kit with limited color choices. I tried to make it more interesting with transparent shading. I hope you like her :D
When I started painting this kit, I just got bunch of new Golden Acrylic High Flow colors and of course I had to try them out :D I really love all the transparent colors available.
This is pretty easy kit with limited color choices. I tried to make it more interesting with transparent shading. I hope you like her :D
Saturday, May 25, 2013
Thursday, October 20, 2011
My older kits
I used to have a very nice gallery on E2046 site, but they decided to reprogram it and I lost all my gallery pics. So since I have to reload all of them back, I decided to re shot some of the kits (my photography skills were very poor at the time :D).
So here is some of the new photos of the old kits.
Mini Belldandy
April 2007
http://s254.photobucket.com/albums/hh107/zasranka1/Ah%20My%20Goddess%20Mini%20Bell/
1/8 Sailor Saturn in shirt
December 2006
http://s254.photobucket.com/albums/hh107/zasranka1/Sailor%20Moon%20Hotaru/
1/5.5 Asuka on Rollerblades
June 2006
http://s254.photobucket.com/albums/hh107/zasranka1/Asuka%20on%20rollerblades/
1/6 Nijihara Ink (My first ever airbrushed kit)
April 2006
http://s254.photobucket.com/albums/hh107/zasranka1/Nijihara%20Ink/
1/8 Sakura on the Lamp Post (my first "properly" done kit and my first entry to a contest)
December 2005
http://s254.photobucket.com/albums/hh107/zasranka1/Sakura%20on%20the%20lamp%20post/
So here is some of the new photos of the old kits.
Mini Belldandy
April 2007
http://s254.photobucket.com/albums/hh107/zasranka1/Ah%20My%20Goddess%20Mini%20Bell/
1/8 Sailor Saturn in shirt
December 2006
http://s254.photobucket.com/albums/hh107/zasranka1/Sailor%20Moon%20Hotaru/
1/5.5 Asuka on Rollerblades
June 2006
http://s254.photobucket.com/albums/hh107/zasranka1/Asuka%20on%20rollerblades/
1/6 Nijihara Ink (My first ever airbrushed kit)
April 2006
http://s254.photobucket.com/albums/hh107/zasranka1/Nijihara%20Ink/
1/8 Sakura on the Lamp Post (my first "properly" done kit and my first entry to a contest)
December 2005
http://s254.photobucket.com/albums/hh107/zasranka1/Sakura%20on%20the%20lamp%20post/
Friday, March 25, 2011
Sakura from Card Captor finished
Another kit that I photographed is this little Sakura.
I had to change her from the last update pictures I posted. Changed her hair color and position of her eyes.
Hope you like her :D
I had to change her from the last update pictures I posted. Changed her hair color and position of her eyes.
Hope you like her :D
Sunday, January 30, 2011
Monday, January 10, 2011
Workbench - Sakura from Card Captor
A new girl on my table is this little Sakura from Card Captor (http://www.e2046.com/product/1376)
The kit is pretty small (only 1/8), but since her dress is so big, she looks lot bigger.
Her skirt/dress was separated into four big pieces. Took me some time (and patients to fix it up)
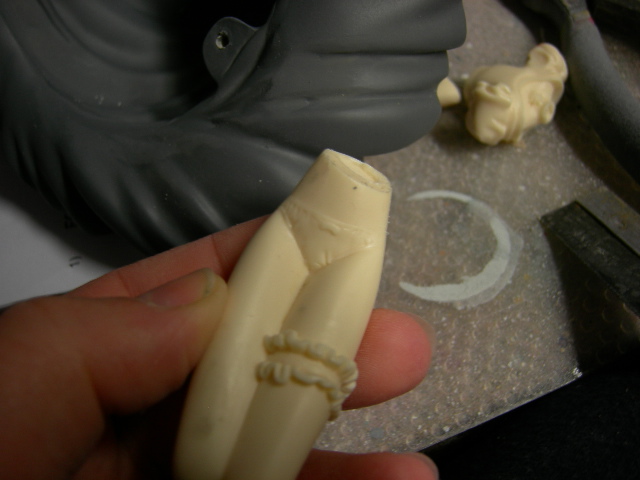
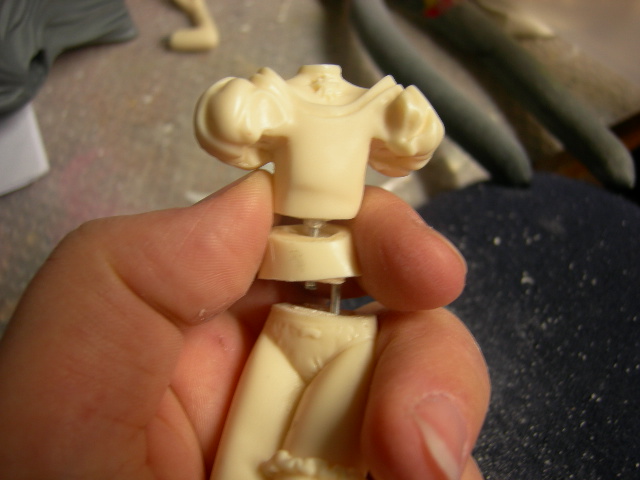
The next little challenge was connecting her upper body to her dress. I figured that the dress should be just one piece, so I decided to saw off her tummy area and connect it to the skirt. I hope that my pictures explain it better then my words :D
Now after some extensive sanding and fixing time, this is what I have on my hands :D
She is very close to be ready for painting.
Oh and while I was waiting for primer to dry, I decided to work on her little base. I am trying out some new technic for the base right now. I am using printed out designs on the paper (I bought the pre-printed stock paper) and apply it to the base. It looks good so far (I still need to apply Future to it and hope its not going to ruin the paper :D )
The kit is pretty small (only 1/8), but since her dress is so big, she looks lot bigger.
Her skirt/dress was separated into four big pieces. Took me some time (and patients to fix it up)
The next little challenge was connecting her upper body to her dress. I figured that the dress should be just one piece, so I decided to saw off her tummy area and connect it to the skirt. I hope that my pictures explain it better then my words :D
Now after some extensive sanding and fixing time, this is what I have on my hands :D
She is very close to be ready for painting.
Oh and while I was waiting for primer to dry, I decided to work on her little base. I am trying out some new technic for the base right now. I am using printed out designs on the paper (I bought the pre-printed stock paper) and apply it to the base. It looks good so far (I still need to apply Future to it and hope its not going to ruin the paper :D )
Subscribe to:
Posts (Atom)