Monday, June 30, 2008

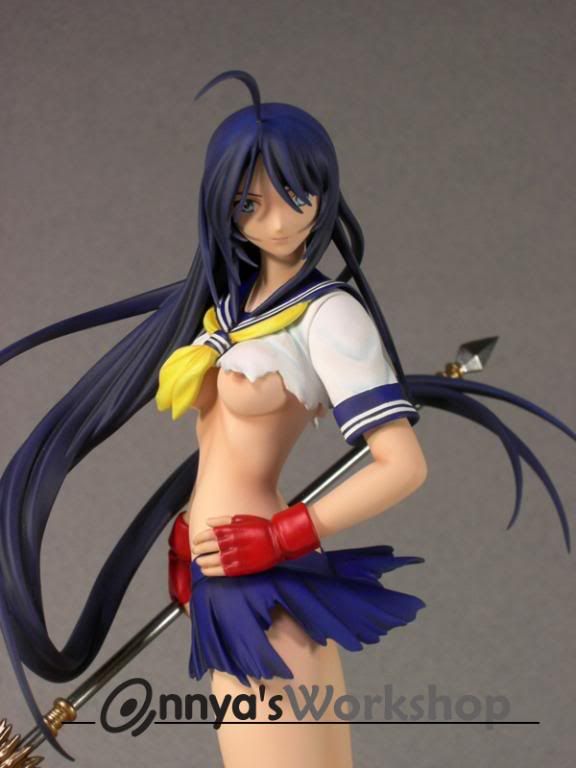
Dian is done

Finally done with this little beauty. She was a challenge to make, but a real pleasure to finish. I had some problem with photographing her. My background paper that I usually use is not big enough for her (she is way too tall), so I had to take her outside on the sunny day. I really like how her skirt looks with natural light, but her skin was all washed out. So I had to borrow a blanket for background and shot it inside. Red color is not just hard to paint, its very hard to photograph. After long struggle with my camera, here is the results.

The legs are not glued yet to the base, so Dian looks a little bit crooked.

More pictures on my photobucket site http://s254.photobucket.com/albums/hh107/zasranka1/Dian%20finished/

Sunday, June 22, 2008

Dian from Ikkitoisen

Another commission kit. This is 1/7 Dian from Ikkitoisen. She is done by the same sculptor that did the Chouun that I did earlier.

The kit is actually quite large for its scale, which is a very good thing (lots of details). She have four different options for display. There is whole version, and there is battled version. Just like Chouun.

The part break down is very good, but its still a very complicated kit. The biggest challenge was the skirt (at least it was for me). The skirt comes in three pieces, also it includes the underskirt which is three pieces also, and on the top of that, the underskirt have a lace fringe with you guess comes in three pieces. I really don't like to see a seam lines on my kits, so I had to deal with each skirt separately. First I glued the top skirt (sand, sand, prime, sand) and I glued the underskirt pieces together too. I think in original design the underskirt pieces are supposed to be just adjusted to the main skirt, but it would leave some gaps and seams and I can allow it. After the underskirt was glued and primed and sanded like hundred times, I glued in the lace fringe. Another session of sanding and priming. Fun


I think that I really hate lace skirts now, well at leas for another month or so. After all that lace was done, I had to mask it all. Fun, fun, fun.
At least I enjoy the painting part.

I still have lots to do, but at least I can see the light at the end of this tunnel. she is coming along very nicely.

Joe Mauer watercolor

Another commission for a friend who is absest about sports. I had to rush this piece a little bit, but I think it turned out very well. This piece is 16x20 inches, watercolor and watercolor pencils, the background is done with airbrush. I think I am getting better at drawing people, but the only problem is that it takes away time from doing my models >.<

Wednesday, June 4, 2008

Mai from King of Fighters

I fell in love with this kit the moment I seen the picture of it. I never played King of Fighters, but the models from this game are very popular. Most of the Mai kits are way too slutty for me, but this one is perfect. It have lots of movement, great pose, and just enough sexiness without being slutty.

This kit was quite a challenge for me. The cast was horrible. Every surface of the kit had bubbles and lots of debris stuck on it (probably from overused mold). Good thing is that I have lots of patience.


Another thing that I didn't like about this kit was the part brake down. Most of them were OK, except the way the sculptor did the rope around her shoulders. The rope was one piece and the shoulders had a very visible connection line which was really bugging me. So I cut the rope in half and made it so it can slide from both sides of the arms. I glued the shoulder pieces and made sure there was no visible seam lines (really bugs me if I can see it, its my small pet peeves ).


While I was cutting the rope, I had another great idea for making my painting easier (more work now, but its saves time later). One of Mai's feet was separate from her leg, but the other one was one piece together. So I decided to cut her second leg too. Plus while I was cutting, I decided to cut the hand too ( I got a little knife happy lol ) It may feel like a lots of extra work, but it really does saves time with masking and painting. Plus it looks cleaner too.


Another thing that I did was carved the inside of the tunic (still had a knife and my hands and in my happy mode). The tunic on this kit is very well sculpted, but I decided that by giving it few more edges will make it even better.


All this modifications did not take too long. I actually like this step in building, just because its very calming and you get to visualize the finished kit. I was not sure which colors to use on Mai, so this was good thinking time for me.

I decided to use red, black and gold colors (the royal colors, how can you go wrong with it). The only thing that I decided to change was the colors of the scarf on Mai. Usually she wears a two toned scarf, but I decided to use just one color. The tunic is a dark chocolate brown with some black shadows (but its really hard to see on the final pictures). I added red the color for under tunic. Most of the cloths is spread with matte finish, except the red color. I tried to make it look like a silky material.

The hair were fun and challenge at the same time. First I painted it light brown, and after that shaded at least with 3 more brown colors in progression from lighter to dark. I really love how they turned out.

Another fun thing to paint was fan. I didn't want to leave it plain white, just not Mai's style (the girl who wears big beads on her scarf would like something more extravagant). I found a nice design on a kimono (web search) and decided to use it for a fan. Here is the step by step. I think its more helpful then me trying to explain it in words.


After I painted the fan, it still looked kind of plain. So it called for a trip to my hobby store (thanks god there is Michales close to my house). Sometimes I get very very lucky and find something great just when you actually look for it. I found a perfect beads for the fan which Mai would certainly approve of.

For the base I used real moss (Michales again) which was kind of fun trying to figure out on how to put in on the base. After mounting the moss and the stone Mai jumps off, the base called for another rock. This part was super easy. Go outside, try out thousand of stones, find the right one, and the kit is complete. TA-DA


The contest picture have been already posted, so here is the link for it http://forum.e2046.com/index.php?c=12
I wish good luck to all people who entered.

Tuesday, May 27, 2008

My May update

Have not been posting for a while, been somewhat busy with my kit for a contest. And she is done today. Yahoo!!!! (this is me being happy) Can't show the complete kit yet, but after its posted on the forum, I will.
On the other side, I am kind of sad, because I can't enter my diorama kits to the E contests. This year they changed the rules that said that we are not suppose to post any WIP's of entered kits before the contests. I already started on the girls from Stellvia as a WIP thread on the forum. Just because they changed the rules so suddenly, they allowed to still do it for this year contest, but the problem is that there was no way I could had finished the kits on time. I was planning to use them for the next contest, but I guess its not going to happen. Sad.

On the happy note, I got few more kits into my collection (collection of unbuild kits that I will never ever finish in my life). One of the kits that I got is a Thai recast of Hellraiser as a SD. Usually this kit is a vinyl, but I got lucky to get him as a resin. Well, not too lucky, because the quality is truly horrible. At least something is scary about this kit, because the movie wasn't.


Isn't he scary? All the pin holes and uneven surface. It least its a fun kit and I love challanges.

Monday, April 28, 2008

My HobbyFanatics prize

Few days ago, I finally received my prize for winning in HobbyFanatics Winter contests (http://www.hobbyfanatics.com/index.php?showforum=84 ) CWModels was kind enough to sculpt a mascot guy from HF logo. He did a great job and I am very happy to have one of the sculpts So when I received the kit, I just couldn't wait to paint it. I was kind of under the weather lately , so it really cheered me up.
I used my usual acrylic paints, shaded with pastel (did a little more obvious shading on his shirt, more cartoon look). I had some problem with his eyes, but I think it turned out OK in the end. So now I have my own personal logo from HobbyFanatics .

Thursday, April 10, 2008

Kanu is done

I am finally done with this kit. I had few bumps doing this kit, but mostly I had fun making her. Soon she will be on the way to her new home and I get to finish up my other Ikkitoisen kit.
There is more pictures on my photobucket site http://s254.photobucket.com/albums/hh107/zasranka1/Kanu/
and lots and lots of WIP pictures.

Thursday, April 3, 2008